Meet the DJM-500, the first ever mixer from Pioneer DJ

In 1995, the DJM-500 helped introduce FX to the DJ booth, while cementing a design that would influence every Pioneer DJ mixer that followed. Here is its story.

Bring to mind a DJ mixer. Whatever image popped into your head just then, we’d guess it was something along the lines of the following: a portrait rectangle shape, with vertical rows of gains, EQs and faders, and a crossfader underneath. There are, of course, variations on this blueprint. Rotary mixers in particular often buck this trend. But it would be fair to say that DJ mixers these days have a typical shape. 

It’s difficult to imagine now, but when Pioneer DJ released its first club mixer, the DJM-500, back in 1995, this design was just one of the many different forms mixers took. As photos from legendary DJs booths like the Paradise Garage and Ministry Of Sound show, mixers at leading clubs tended to be wide, not narrow, and were rack-mounted below turntables—but there was lots of variation between the layouts that different brands used. 

“At that time, touring DJs had difficulties because each country they went to had different kinds of mixers,” said Kou Atsumi, who was in charge of product planning for the DJM-500.  

In 1994, Pioneer entered the DJ market with its range of CD players, led by the CDJ-500. As a designer and manufacturer of hi-fi and car stereo products, this new product proved relatively straightforward to produce from a design and technology perspective. But creating a DJ mixer from the ground up? That was a different story entirely. 

“The CDJs had taken many technologies from Pioneer products,” explained Atsumi, “such as a technology to prevent skipping sound from the car audio division, or a technology which enables even CDs with scratches to be played. But for the DJM-500 we needed to start from scratch as we did not have any experience making a mixer. It was very difficult to make even a single equalizer because it was different from either the home or car equalizers.”

With the portrait design of the CDJ established, it seemed logical that an accompanying Pioneer DJ mixer would sit in proportion alongside it atop a table. However, a design like this would be a different proposition for most club DJs at the time. There was understandable anxiety among members of the Pioneer DJ team, with no guarantees that DJs would adopt the new workflow. “It was an unprecedented layout,” said Atsumi. “It was the first four-channel vertical layout with headphones on the left and effects on the right. It was designed so the sound would flow from the left to right.” 

The effects Atsumi mentioned were another novel aspect of the DJM-500. There had been mixers on the market with basic effects, and DJs had experimented with separate effects boxes designed for instruments. But generally speaking, the concept of DJs using effects was in its infancy. “An idea popped into our mind that by adding effects DJs would be able to entertain the audience even more,” said Atsumi. The Pioneer DJ technical team made a painstaking effort to research and trial different guitar effects to see which could be applicable for DJ use.   

The much-loved house artist Roger Sanchez was among the early adopters of the DJM-500. “It was all in one box,” he said. “So rather than having to go to an external effect and try to dial through things, the ease of selecting effects and just adding them to the channel or to the overall mix made it pretty seamless.” 

The video below demonstrates the effects section of the DJM-500. There were six effects total—Delay, Echo, Auto Pan, Flanger, Reverb and Pitch Shifter—all of which are commonplace on mixers and in DJ software these days, but would have been a groundbreaking offering back in 1995.  

Using the DJM-500 in the present day, you quickly notice the functions that feel strange by today’s standards. Assign a Delay effect to your chosen channel and you get an overall value in milliseconds on the Auto BPM Counter screen, with another milliseconds readout below on the Parameter screen. 

If, for example, the top screen says 464 milliseconds, that’s the time length of one beat of the currently playing track. So in order to get a 1/2-note delay, we adjust the parameter knob to roughly half that value (240 milliseconds in the video), at which point the little 1/2 beat indicator lights up. If we then press the Effect On/Off button (the design of which is now familiar to all Pioneer DJ users) we should get a delay effect that’s in time with the track. 

But if you were to tweak the parameter knob for Delay and Echo “out loud,” i.e. before a beat light illuminates, you’ll get audio chaos, as the effect is not in time with the track. There was also no Level/Depth control on the DJM-500. If an effect was switched on it was essentially always set to maximum, or “fully wet” to use the technical term.   

The Echo, Flanger and Auto Pan worked in roughly the same way as Delay. Switch to Reverb, though, and the parameter knob became a 0 – 100 control, meaning the size of the reverb gradually got bigger. Twist the effect selector one more time and you got Pitch Shifter, which flipped the parameter to -100 to +100, which slowed down or sped up the track to almost comical degrees. 

“The first main effect was the Delay… which helped me to do transitions, drops and create dramatic tension,” remembered Sanchez. “That was one of my favorite ones and pretty much a go-to. Also the Reverb, especially when you cranked it up to 100. You can kind of create this cavernous effect. Again, also very useful for transitions and to create big moments. And then the Flanger was always a fun one to add a really interesting texture, especially when it came to tracks that are very percussion-oriented, or for acapellas to add a different texture to the vocal.” 

During initial tests of the DJM-500, DJs weren’t as enthusiastic as Sanchez would eventually become. “When it came to whether DJs actually used the effects, they didn’t at first,” said Atsumi. “They didn’t know what they were doing at the first phase of the mockup. That was why we installed a BPM counter, so DJs could apply effects linked to the beat. In this way it is easier to incorporate effects into their performance. I thought that was when DJs would consider using it, if we could tell them, ‘You can apply a 1/2-note effect linked to the BPM.’”  

It was originally hoped that the BPM counter could be a selling point of the mixer, making beatmatching easier and more accurate. But internally it was decided that the BPM detection wasn’t quite good enough. “Nowadays beat analysis by rekordbox is highly accurate and most people who play electronic music do not have any changes in BPM,” said Atsumi. “But back then there were many instrumental songs being played in addition to electronic music, so the conditions were even worse.”  

Using the DJM-500 now, it’s not hard to see what Atsumi means. Aside from its general accuracy, the BPM readout tends to fluctuate throughout a track. And we now expect to measure BPM in values of 0.1, rather than the whole numbers the DJM-500 offers. But as a rough guide to get your beatmatching in the right ballpark? The DJM-500 honestly isn’t too bad. 

The views and feedback of professional DJs play an integral role in the design of Pioneer DJ projects, a practice that was established back in the days of the DJM-500. Atsumi and the team showed prototypes of the mixer to some of the DJs who’d been trialing CDJs, and they received important advice. 

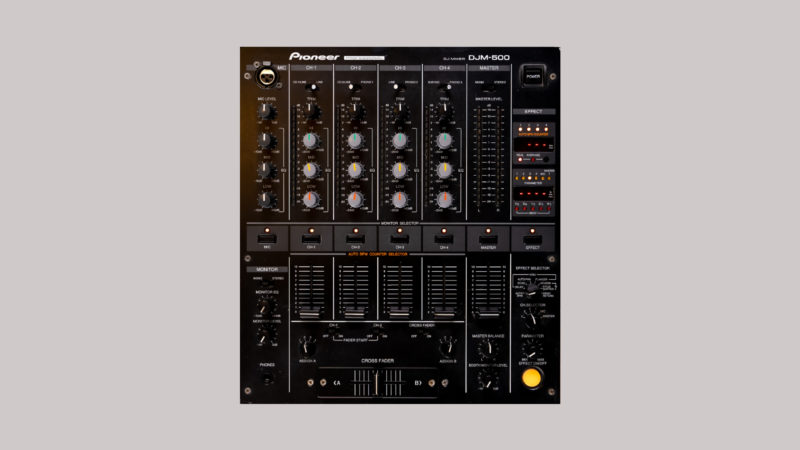
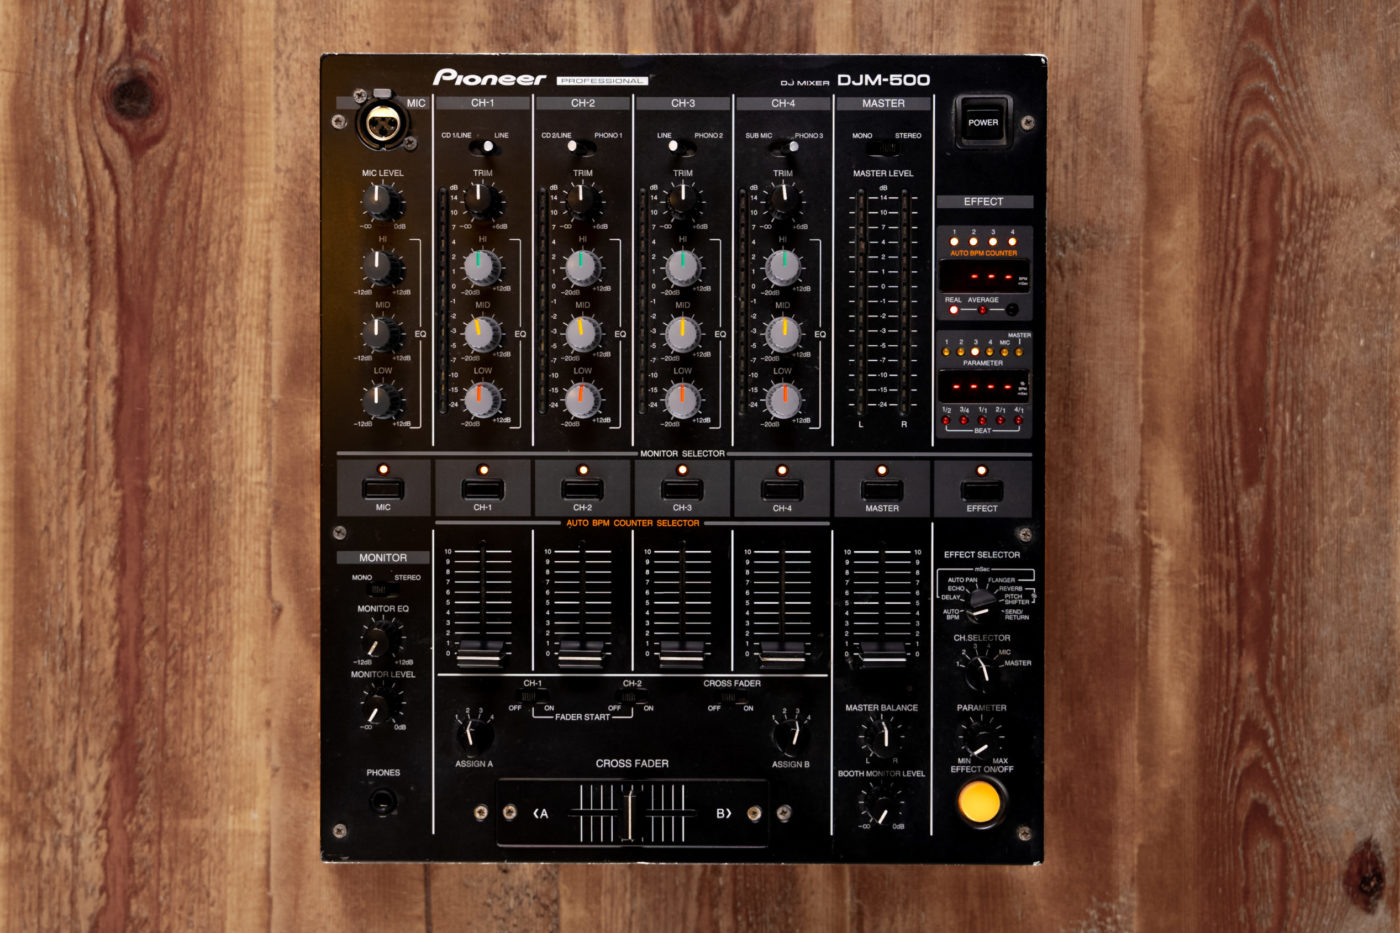
“There are trim, EQ, cue buttons and all sorts of things on a mixer, and they had to be laid out properly and correctly vertically and in line with the flow of sound,” said Atsumi. “There were mixers with four cue buttons on the left, but the feedback from DJs was that it was correct to lay them out in line with the flow of the sound. It’s basic now, but through hearing from DJs we could create something easy to understand and use. We were able to get feedback from DJs who shared our desire to make something easy to use, good and interesting.”

This design input from DJs no doubt helped make the mixer a popular new option in the booth. House, techno and mobile DJs in particular warmed to the DJM-500, appreciating its simple layout, compact width and effects. “What made the DJM-500 revolutionary,” Sanchez said, “was adding that level of detail to effects. And then in addition, having the EQs on each of the channels, which gave a lot more control over the frequency, and just allowed me to be more creative in how I constructed my sets.”

Atsumi and the team continued with research and development, collecting feedback from DJs and channeling it all into the DJM-500’s successor, the DJM-600, which came out in 1998. This was an evolution rather than a revolution. Key features like the mixer’s sound quality and BPM counters were improved, while sampler and loop functions were added to the effects section. 

There were doubts about the sound quality of the DJM-500 among some DJs, with the feeling that the audio degraded as the mixer heated up. The club scene was becoming increasingly professionalized, and the DJM-500’s analog circuitry couldn’t always reproduce the clear mid and high frequencies that DJs were seeking.   

Atsumi mentioned that the release of the eventual DJM-800 model, Pioneer DJ’s first digital mixer, was when the team thought that they’d nailed the necessary step up in sound quality. The less well-known DJM-1000, a huge six-channel mixer designed as an installation unit for clubs, was also produced for the highest standards in sound performance. 

Across decades of improvements, continuing in recent times with the top-of-the-range DJM-V10 and DJM-A9, as well as controllers like the DDJ-FLX10 and the all-in-one OPUS-QUAD, there’s been a single consistent fact: the basic design layout first established with DJM-500 has remained in place. “These basic aspects were included in the future models,” said Atsumi. “We were able to establish something unshakable.”

Words: Ryan Keeling